
Good Morning and Happy Wednesday! Today, I have my new favorite project to share with you - my mother's birthday present! Her birthday was back in May, but I decided to make a gift for her that turned out to be a bit more time consuming than I had originally planned and so it is coming to her now as a belated birthday present. This isn't a surprise, but it is the first time that she'll be seeing it and so - Happy Birthday, Mom, I hope you like it!

I love home decor pieces and I'm always looking for new ways to personalize decor. When I went to IKEA one day and saw this tray (the KLACK), I knew exactly what I wanted to do. Okay, well not exactly. At first, I wanted to penny tile it, but then I decided that maybe that wouldn't look quite as good as I thought and before I ruined the tray, I wanted to try a different idea. And then, after an errand to Lowe's, it came to me - I would make my mom a mosaic tiled tray. After that, the idea took off and I never looked back.
First, I spray painted the tray a rusted bronze color, Antique Brass by Rust-Oleum. I didn't take a close-up view of the tray before I sprayed it, but this is a shot of where I do all my spray painting - in our garage by my car.


Then, I grabbed all of my supplies.

tray
scissors (I traded them in for the x-acto knife you see pictured)
mosaic tile (sheets purchased at Lowe's)
mosaic tile glue (from Michael's)
Envirotex Lite - Pour On High Gloss Finish (from Michael's)
Once the tray was inside and sprayed, I set to work with the tile, cutting it up into its smaller pieces. Afterwards, I went back was careful to remove as much of the weaving part as I could from each one. (See how it overhangs now? I removed that part.)

Then, I used some practice tiles to measure out where I would want to put them. The spacing wasn't perfect, and it creates a slight unevenness across parts of the surface, but the finisher over it at the end keeps it perfectly in place and creates an even surface - so it didn't worry me.

As soon as I knew how many would fit and that I could place them as I wanted to - I got out the mosaic tile glue and started gluing the tiles down.


This was the time consuming part. I quickly found it worked better if I only did a row at a time and then let that dry before moving on to the next and so that, coupled with a dog that started barking every time I tried to sit and work on the project (he was singing happy birthday to his grandma, I'm sure), made this part of the project take a couple of weeks.


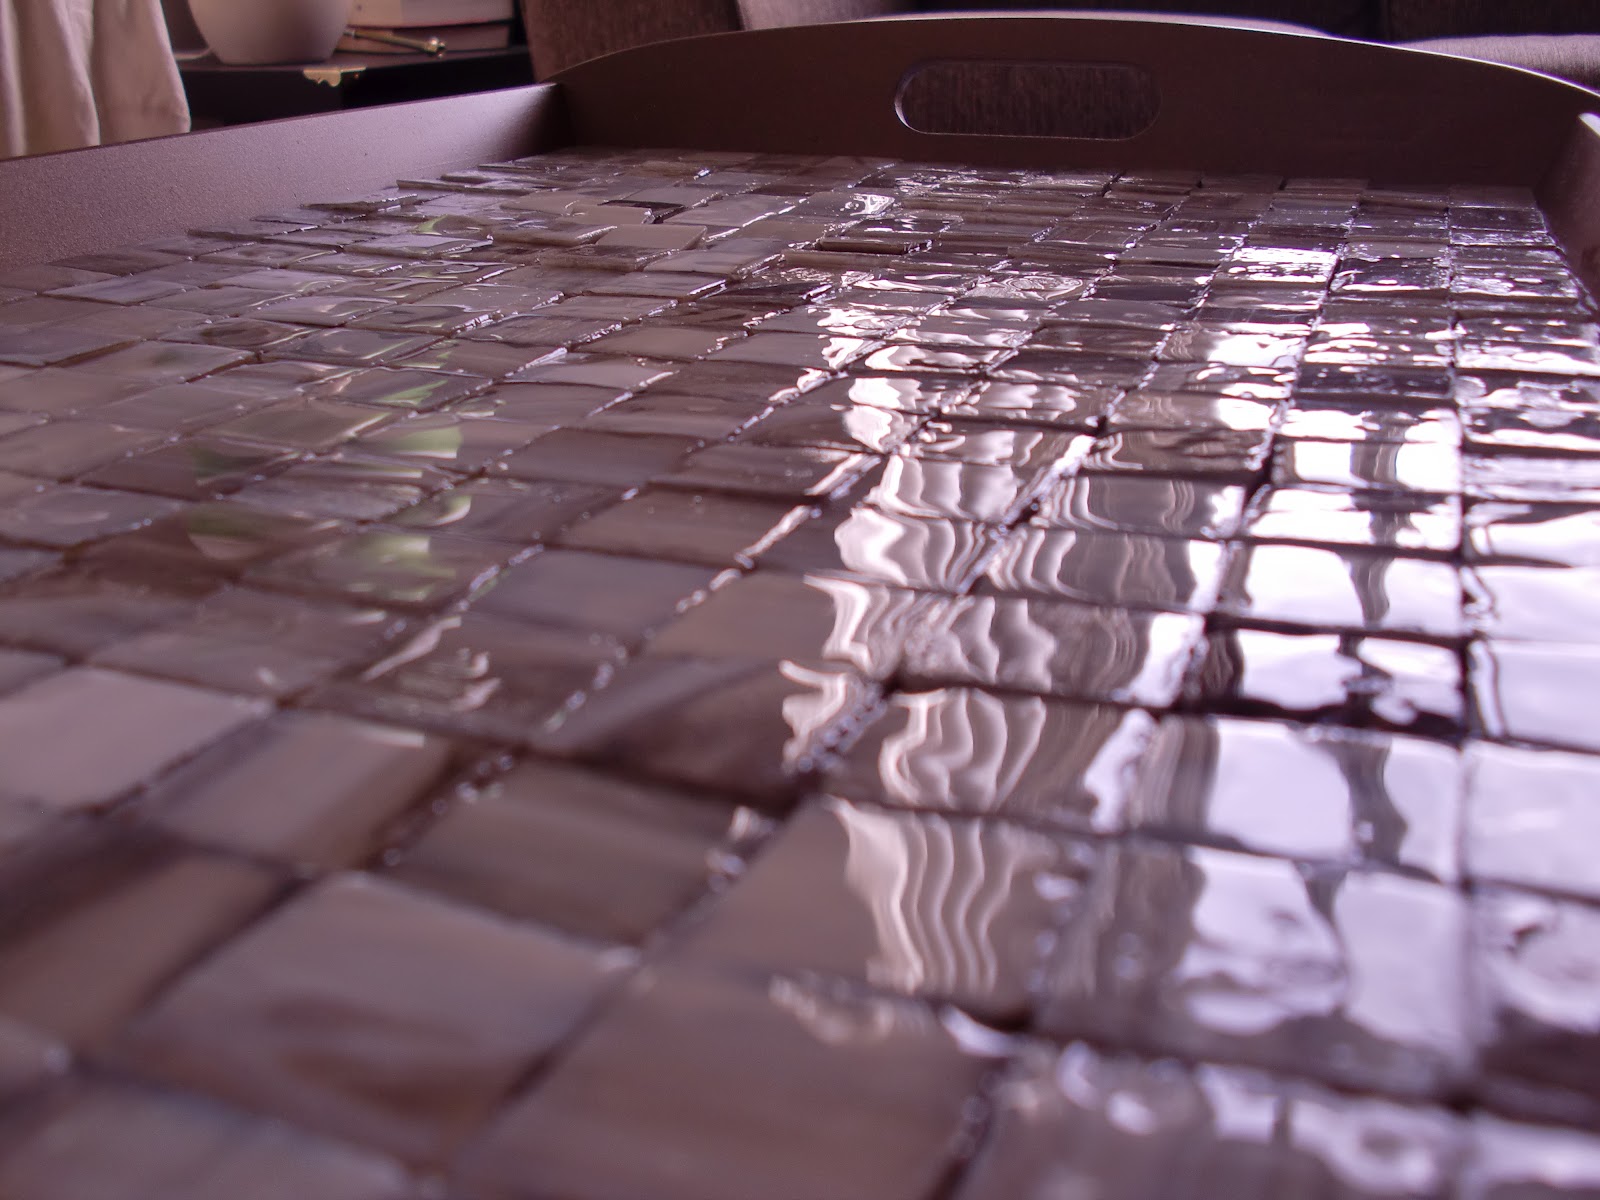
Finally though, I got all of the pieces in place! Then, after I made sure they were set, I got the sealant ready.

The instructions say to pour equal parts of each bottle into your mixer and then stir well. It also adds that having a second container helps. So, I used the very scientific method of measuring pouring back and forth between large Solo cups and then stirred extra vigorously with chopsticks. (I told you - scientific all the way.) And then I poured it slowly and evenly over the top.


Isn't she pretty? Look at her shine?

P.S. I'm linking up to parties at Creations by Kara, DIY by Design, Dragonfly Designs, seven thirty three, the DIY dreamer, The Johanson Journey, Thrifty Decorating and The NY Melrose Family. Come check out all the great projects!


awesome girl!! I love how this turned out! Great idea!! Thanks for linking with me!! hugs!!
ReplyDeleteThis is BEAUTIFUL!!!!!! Love the color too!!
ReplyDeleteThank you for sharing this at The DIY Dreamer... From Dream To Reality! Can't wait to see what you link up this evening!
Just searching for ideas for my mom's birthday this weekend and so glad I came across this. I have a ton of tiles in the garage that would make for an excellent project. I'm thinking a bit of a twist though and making a mosaic jewelery box. Thanks for the great idea!
ReplyDeleteJust searching for ideas for my mom's birthday this weekend and so glad I came across this.
ReplyDeleteI have a ton of tiles in the garage that would make for an excellent project.
I'm thinking a bit of a twist though and making a mosaic jewelery box. Thanks for the great idea!
Sara,
ReplyDeleteThis is a great idea! I'm going to make 10 trays as Christmas gifts! One question - how much did you pay per sheet of tile? Thank you!
-Shannon
Hi Shannon! I'm sorry but at this point I don't remember what it cost. I can tell you that it wasn't too expensive and I was able to buy them in sheets at Lowe's. Good luck with yours!
Deletejust about all tile saws cut from abrading as well as scraping your surface of your material with high speed. the actual is actually performed that has a diamond blade.
ReplyDelete